Curious about how to limewash a brick house? I’ve been where you are. Researching and reading any blog post about how to limewash brick houses that I could find. Saving pins. Messaging bloggers who have done it before. I even explored how to use traditional paint on your brick vs. lime wash, and time and time again, I kept seeing houses who used Romabio lime wash.
The truth is, this isn’t my first time “painting” brick. At our last fixer upper, I used Romabio limewash and limewashed the entire house myself (while Mike watched the kids). I’m a better painter than he is – we know our strengths – and had done the research on how to apply it, so I felt confident in doing it myself.
The reason I use- and continue to use – Romabio is because it’s a natural mixture that still allows your brick to breathe, unlike paint.
Ready for a before and after of our first house?
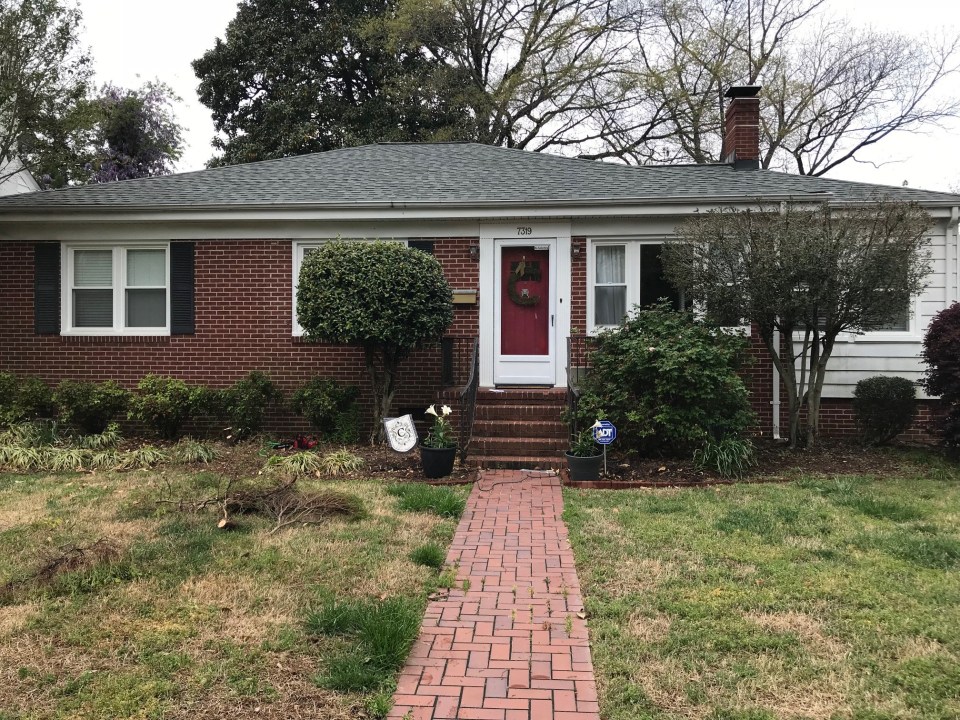
Here’s the house when we bought it.
And here’s when we went to sell:

We made a decent amount on the sale of that house, and I attribute a lot of it to the curb appeal we created by limewashing our house white.
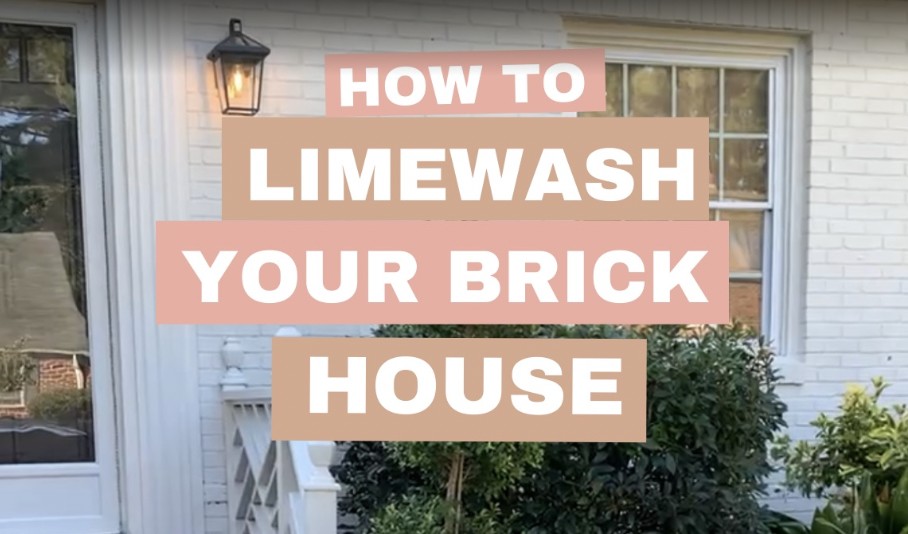
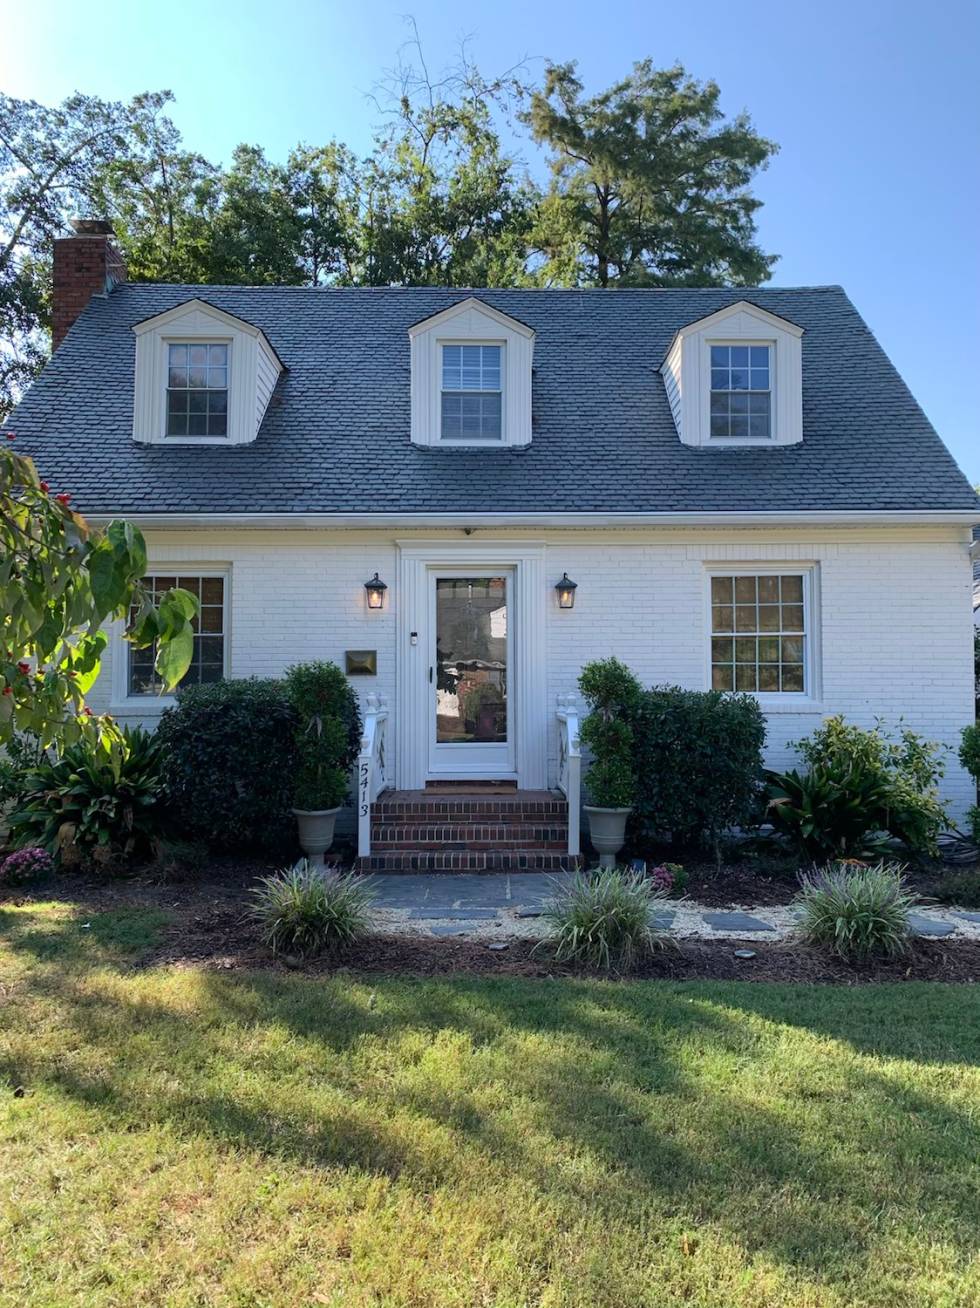
How to Limewash A Two Story House
Cut to this house one year ago. When we toured this as-is fixer upper, I remember driving away and asking Mike if he would paint the brick. He said, without hesitation, “Oh yes. Definitely.”

So we sort of always knew we wanted to lime wash this house. We like the look! And it can really scream “Hey a lot about this house is NEW, even though we just bought it last year…” It invites buyers in to see what else you did inside.
Masonry Flat Paint Vs. Romabio LimeWash
This time around, I definitely wanted a more solid look to our brick than lime wash usually achieves. I explored Romabio’s Masonry Flat, which is essentially paint made for brick that gives you a solid color. Unfortunately, they were having supply issues due to Covid, and I couldn’t find Masonry Flat ANYWHERE.
If time is on your side and you’d like a solid color without the aging that lime wash will do, then I’d recommend Masonry Flat. Wait for what you really want.
If you want a solid look and are selling your house in a few years, then I’d still recommend lime wash if you can’t find Masonry Flat. I’ll show you below the formula that we used to make our lime wash thick and solid.
And if you’re wondering about how lime wash ages, I drive by my first fixer upper all the time, and it’s still as solid as it was three years ago. But it will age over time into that beautiful, chippy style.
If you want the “aged” lime wash look, then definitely do the lime wash and not Masonry Flat. To get the aged look, you use a hose to wash off some of it as you go.
What’s The Best Time of Year to Paint Brick?
I’d choose Spring or Fall to lime wash your brick. You definitely don’t want rain in the forecast because it will wash off your lime wash. You also don’t want an overly humid day. The first time I painted, I painted in late May, and it was so hot and humid that the paint had a hard time drying. I also almost died of dehydration, but alas, that’s a story for another day.
For our current house, we painted in mid-September. It was the perfect 65 degrees outside, a few clouds, and no rain. I’d recommend ordering your supplies and having them ready to-go in case a good stretch of weather comes along.
Supplies You’ll Need to Limewash Brick
I’ve rounded up all of the supplies we used here
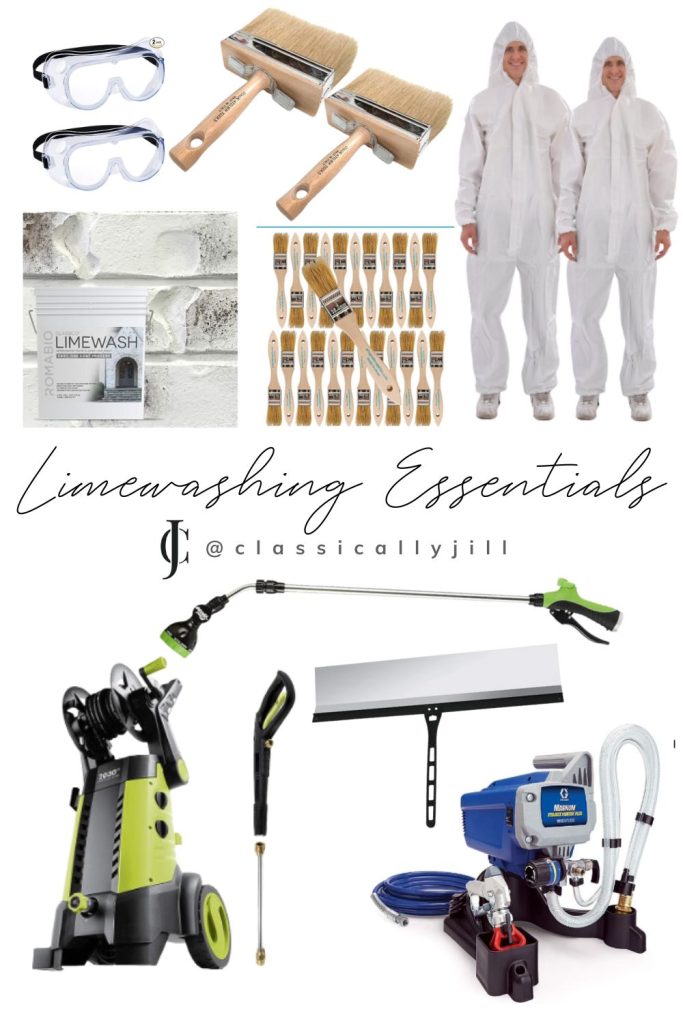
Weekend Before: Pressure Wash Your Brick
The weekend before we painted, we pressure washed all of the surfaces we were going to paint.

You’ll want a clean surface so that your lime wash can adhere onto the brick. Especially behind bushes and close to the ground, you may notice moss or green slime in the grout of your brick. Be sure to get all of that off. Here’s our pressure washer we used.
Day Before: Prep Your Brick for Limewashing
The night before, we like to prep the area so that we can start first thing the next morning.
- Prepping for us meant removing the shutters around our windows
- Moving any potted plants away from the house
- Removing or covering light fixture and mailboxes
- Covering the windows with a tarp and tape or flattened cardboard boxes

If you have new landscaping or don’t plan to trim your shrubs anytime soon, I’d also recommend covering your landscaping with a tarp. If you’re using a sprayer, the paint definitely drifts. You’ll have tiny white spots all over your plants if not.
Morning Of: Preparing Your Limewash
The big day is here! I recommend getting a good night’s rest beforehand and starting bright and early before the sun gets too hot. For us, that mean 60 degree temperatures in September, starting around 9:00 a.m. after we dropped our kids at school.
You’ll first need to mix your lime wash solution. Because we wanted a slightly thicker, more opaque look, we definitely were careful not to add too much water when diluting.
Romabio’s formula was 2-3 gallons of water for every 4 gallons of lime wash.
To get the more opaque look, we poured 2 gallons of lime wash (about half of the tub it comes in) into our giant 5 gallon Home Depot buckets. And then we added a gallon of water to it.

We then attached this paint mixer to our drill and mixed up the lime wash this way. I’d highly recommend this tool! It does a great job of mixing the lime wash thoroughly. The mixture can be pretty dense, so you really need some power to incorporate the water into it. Imagine mixing water into mud. It’s kind of like that.
How Much Limewash Should You Buy
This is going to depend on your square footage. Romabio’s website says that one gallon will cover one coat of 450 sq ft. We used two coats.
We purchased three large 4 gallon tubs of lime wash to do our 2300 sq. foot house. We only ended up using two of those 4 gallons, but that’s mostly because we have siding on the back of our house.
How To Apply Limewash to Brick
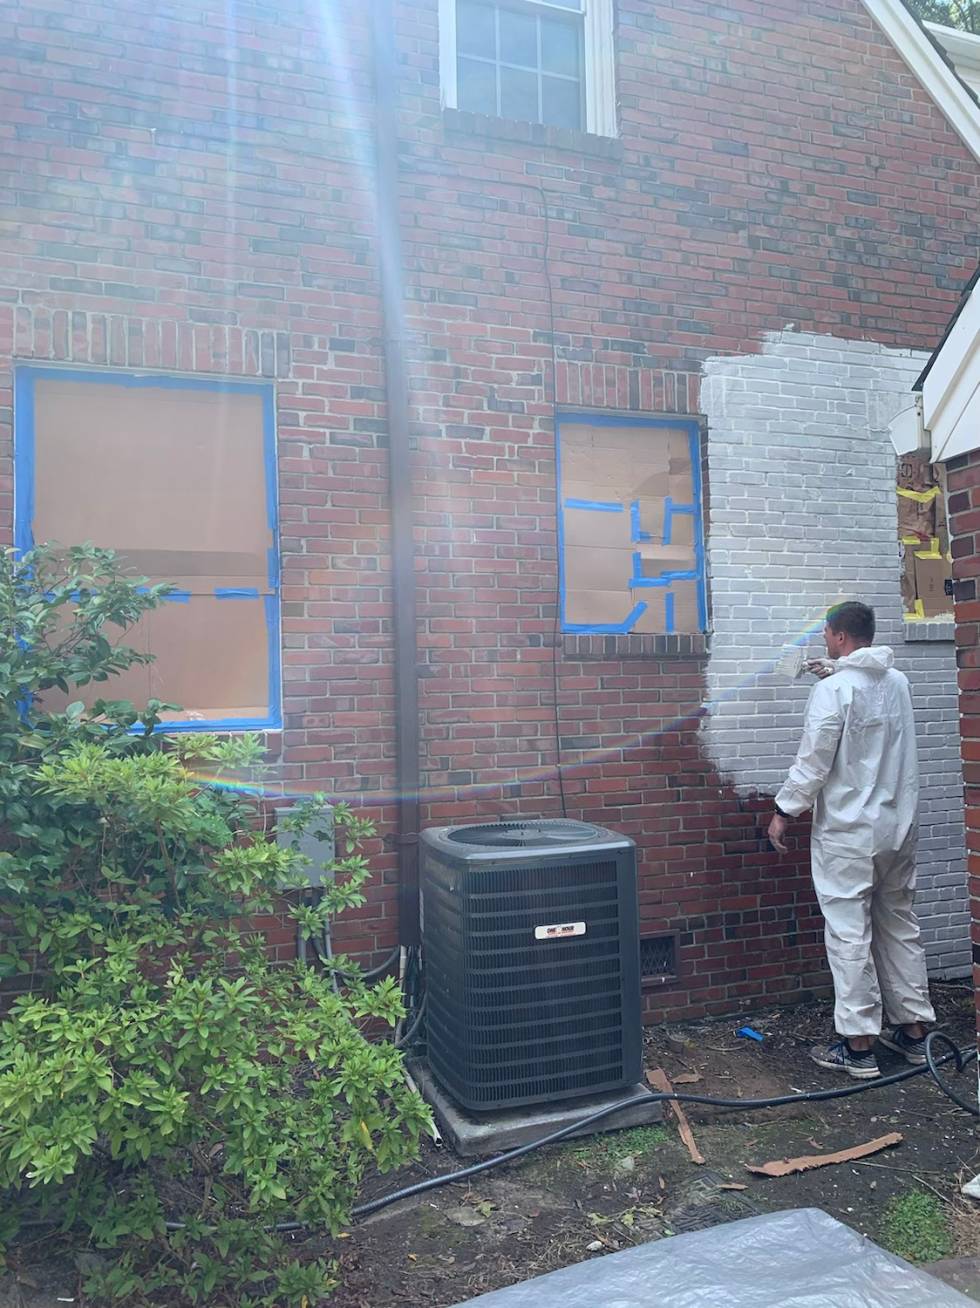
Ready to paint? Your brick needs to be wet before you paint the lime wash onto it. You’ll need to do this bit by bit as you go. So you’ll spray an area with your hose, then paint the lime wash onto it. Then you’ll spray a new section beside it and paint there.

Because you need the water, I recommend having a long hose to work with and this hose extender. We had some areas where our hose wouldn’t reach. Also, if you only have one water spout on the outside of your house, you could get a hose splitter to have two hoses, but what we found was that this water spray bottle did the job just as well. So Mike usually took the hose and I used the spray bottle. Each one works well! And it helps to have a second water option so that two people can paint at once.
Work From Top Down
You’ll want to work from top to bottom. Because we have a cape cod style home, we could work from our roofline to the ground, section by section.
The reason here is that you’ll need to wet the brick, right? So if you paint the bottom and then wet the top, you run the risk of washing away everything at the bottom you just painted.

So spray the entire section, top to bottom, then start painting at the top. If the bottom still looks wet, go ahead and lime wash the bottom. If it looks too dry, you can use the spray bottle to add a bit of water before you paint it.
Then move onto the next section beside it, working again from top to bottom.
Applying Limewash with a Brush Vs. Sprayer
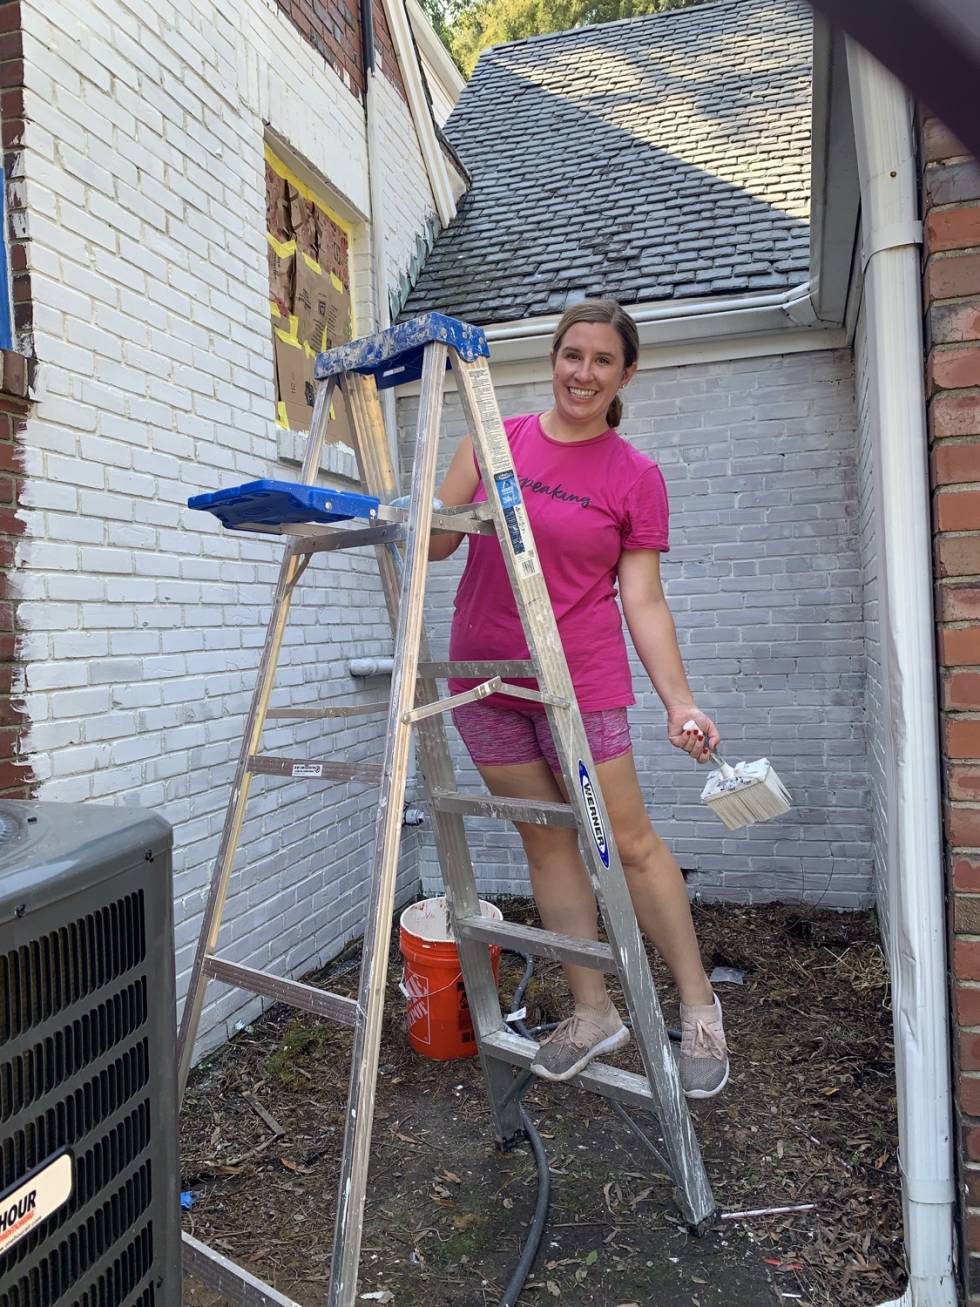
I painted our first house entirely with a brush. It’s a lot harder to use the brush, but there are times when it makes sense. You could do around your windows with a brush, for instance, if you’re worried about overspray from a sprayer.
The brush would also be my choice if you’re doing a more transparent, chippy style.
That being said, once we got our sprayer up and running, it went a lot faster with a sprayer. It also helps in hard-to-reach areas because you can paint your house from 12-16″ away, unlike the brush.
We also had this shield to use to prevent overspray. This is handy around windows, doors, gutters, downspouts, or anything else you’d like to protect from overspray. It’s fairly lightweight too!
How to Paint the Second Story of a House
We knew the second story of our house would be an issue. Our first house was a ranch, and I painted that with a 10′ ladder – no problem.
We had a 20′ ladder that our neighbor lent us, but being up that high on a ladder scared both of us pretty bad, so we rented THE LIFT.
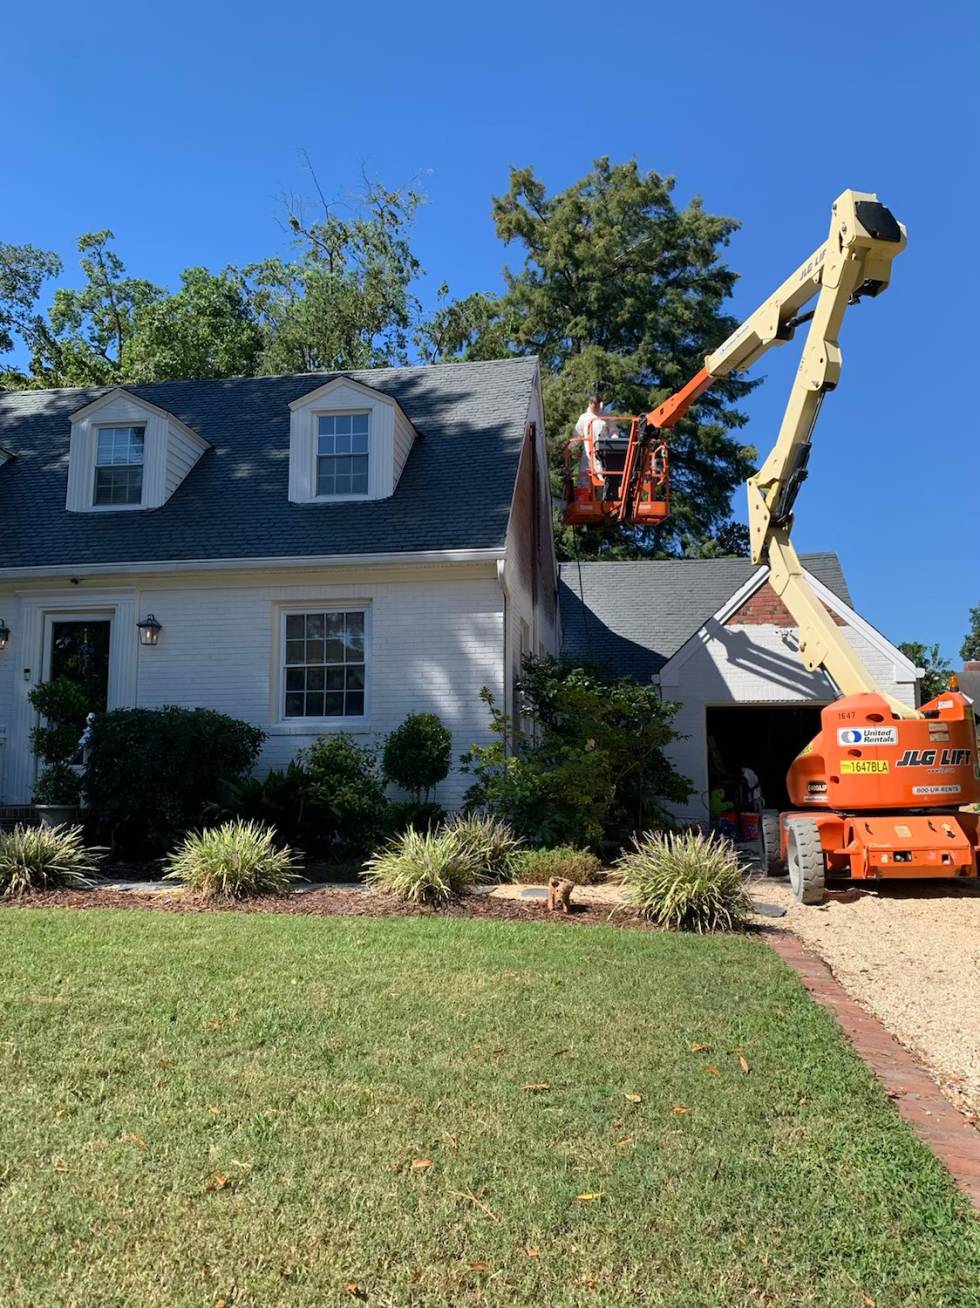
We rented it for a day from Home Depot. They delivered to our house and picked it up a few days later (which I wish we had known. I would have used it to trim some trees in the backyard too.) I think the total rental and delivery fee was somewhere around $300.
The other side of our house was too narrow to drive the lift over there, so Mike worked up the courage to use the tall ladder. He said it was fine as long as he didn’t look down.
To paint the second story on a ladder, using the spray was key. This paint sprayer has a long hose, so he was able to have the sprayer on the ground and carry the spraying wand up the ladder. He also would carry the hose with the extender up too. I think he was able to carry both in one hand and hold the ladder with the other.
I also saw him hook the paint bucket onto the inside of the ladder with a hook. I think he picked that up at Home Depot, for the times he used a brush. That helped so he didn’t have to keep going up and down the ladder to get more paint.

The Grand Finale
Overall, we started this project on a Monday and were done by Thursday! Yes, we were tired, and yes, we used some Advil along the way, but overall, it wasn’t that hard!
If you don’t mind painting the walls inside your house, you would probably do just fine with lime washing your brick yourselves. Plus, you can save THOUSANDS of dollars.

Cost to Limewash a Brick House
We never got a quote on lime washing our brick, but a lot of you have messaged me your quotes. It’s usually around $10,000!
Here’s what we spent:
Limewash – (2) 4 gallon tubs – $530
Masonry Brush – $40
Paint Sprayer – $270
Hose Extender – $12
Spray Bottle – $3
Spray Shield – $25
Goggles + Painters Suits – $35
Paint Mixer Drill Attachment – $9
5 Gallon Bucket with Lid – $8
Pressure Washer (already owned) – $170
Total: $1102
It’s hard to find any type of renovation on a house for $1000, let alone one that changes the entire look and feel of your whole house.
If you have any more questions about it, feel free to comment below. I’ll do my best to answer them!
Pin This Post
View this post on Instagram
View this post on Instagram