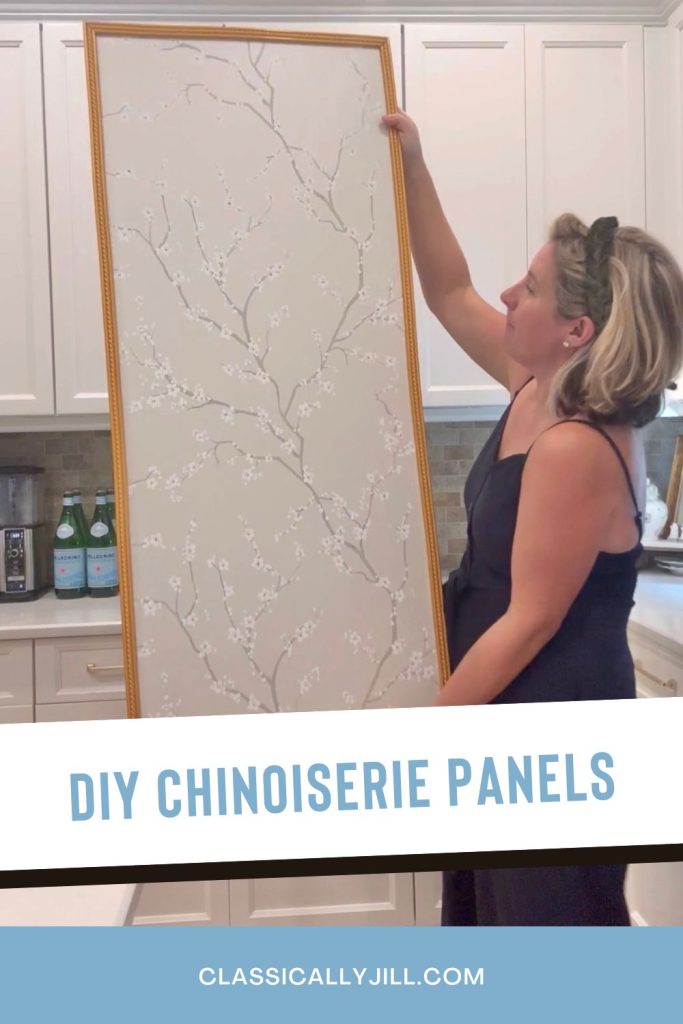
I love a big statement chinoiserie panel, but getting my hands on one is 1) pricey and 2) hard to come by. So here’s what I did:
Searched Etsy for a chinoiserie wallpaper style I liked. I found this one, and messaged the seller to ask her to put it the entire design on one panel. This is important because wallpaper is usually meant for more than one, so the design may not be grouped all on one panel. She was happy to oblige!
Bought some particle board in the wood hobby section of Home Depot. It came in a 4×2 size, and my panel was 5’x2′, so we bought two boards and added one foot of one to the other to make it 5″ long. We did this by adding a board to the back that glued both pieces together. If you just want a 4×2 panel, you won’t need to do this.
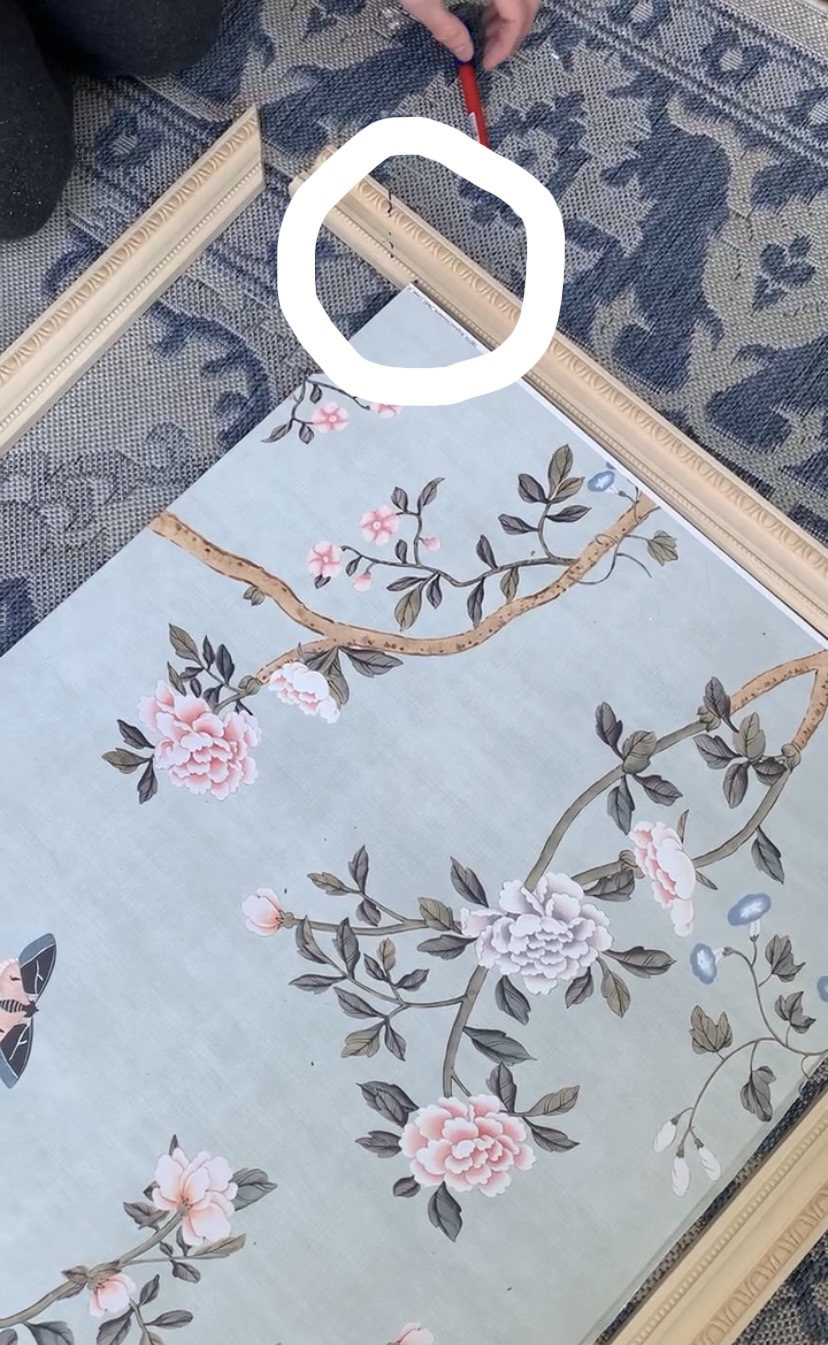
I picked out some molding at Home Depot that I thought would make a good frame. This one is pretty ornate, which I thought would go well with the traditional look of the panel.
We applied the peel and stick wallpaper to the board. That’s the easy part. It was time to make the frame.
Then we measured the length of the panel. Ours was 60″ long.
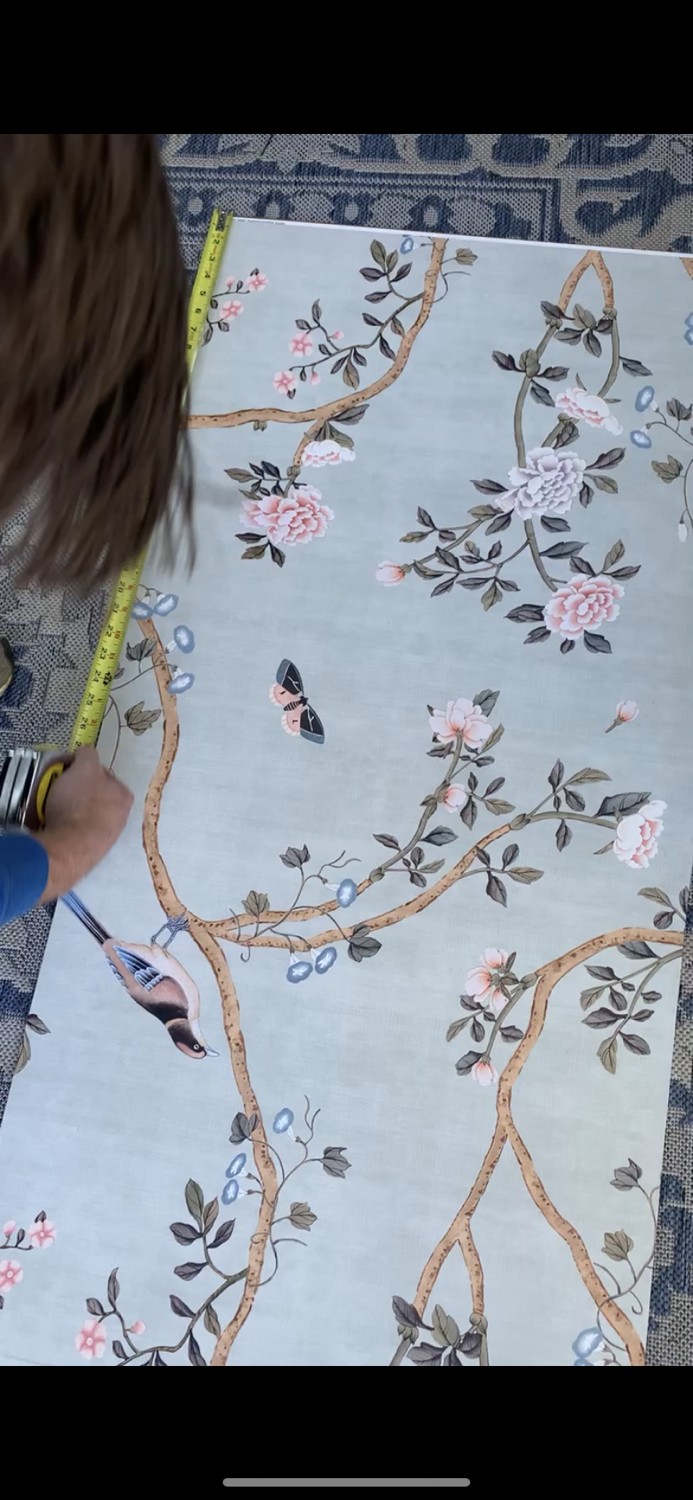
We then measured the length of the molding and marked 60″. You’ll also see we added a diagonal line from that marking in the direction that we needed to cut the molding in order to make a 45 degree angle. You’re going to cut 45 degree angles, but remember, to make a corner, you’ll need your angles to go two different directions. So as a reminder, we added a dashed line at that cut mark. This just serves as a reminder once you get to the saw, so you don’t cut it the wrong direction.
I used a miter box to make the cuts along with a small saw. Of course, it’s a lot easier to do if you own a table saw, but I wanted to show you how to do it without power tools too.
To use a miter box, you just lay the molding in there, and there are grooves for a 45 degree angle. You’ll line your cut mark up with those lines and saw back and forth until it goes through. Remember to saw in the direction of your dash marks.

Once you have that first piece cut, take it back to your panel. Lay it beside it and mark the end of the panel on your molding. Add those diagonal dashes again for the direction you need to cut it.
We repeated this for all four pieces of molding.
Then I spray painted them gold using Rustoleum Metallic gold.

Once they dried, I brought them back. We laid them until all the pieces were touching in the shape of the frame. We then used a nail gun to nail into the corners. The nails went through both pieces of wood in the corner to connect them.


We repeated that for all four corners.
Then we flipped it over and used a staple gun to go over the seams in the corners, too.

Now to attach the frame to the panel. Our initial idea was to use the staple gun to bridge the two: the frame and the panel, but I got worried that the staples were too long and that they would go through the panel and show on the front side.
So here’s our workaround:

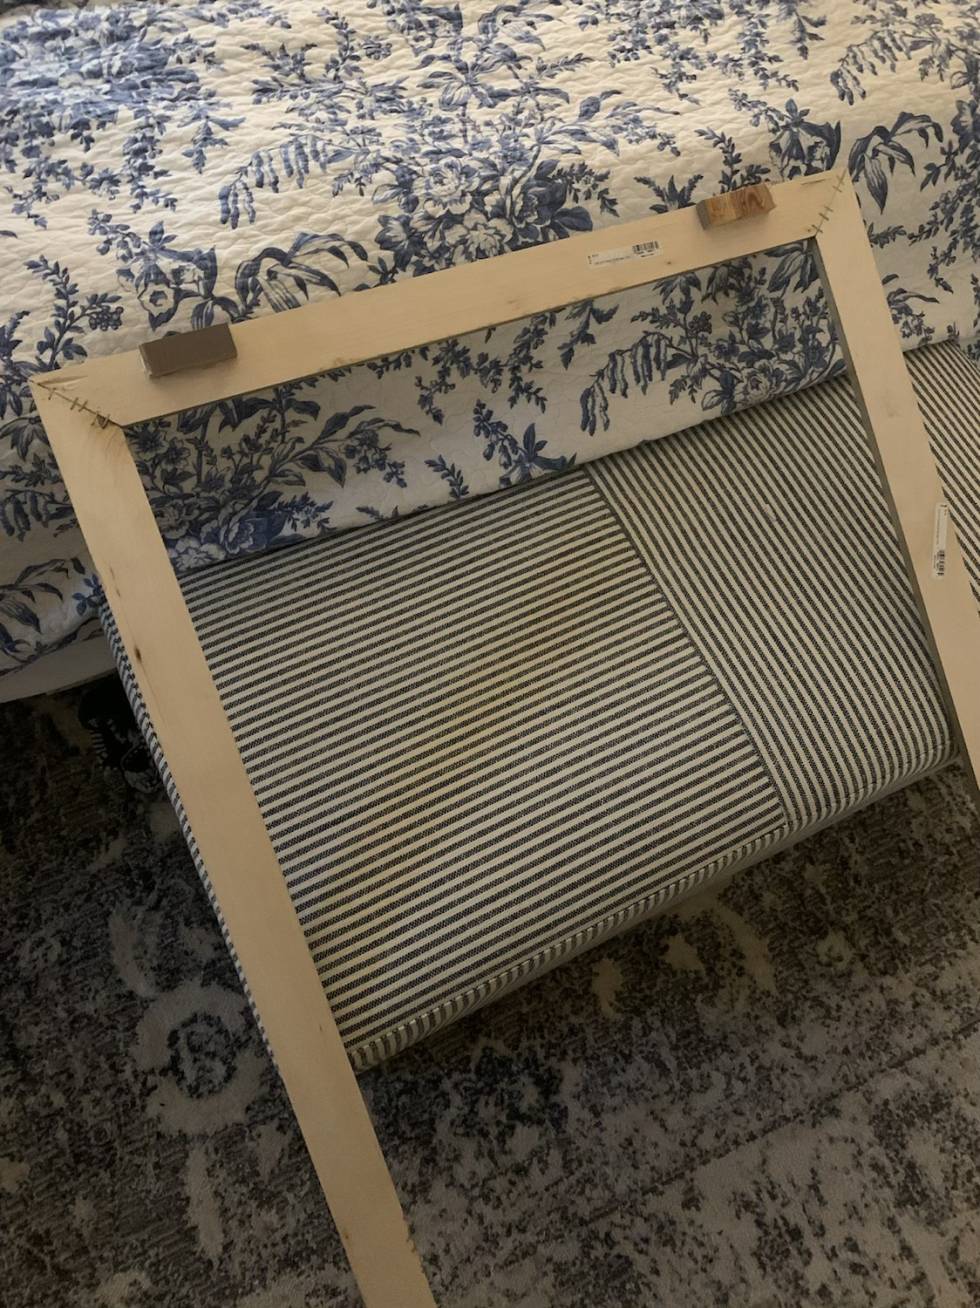
We added two pieces of wood to the top back of the frame. We hung the panel and then marked where those pieces of wood would be above the panel. We drove nails into the wall under those blocks. So really, the two are hanging separately on their own nails. This probably isn’t a great long term solution, but this is in our bedroom where it won’t be bothered.
Eventually, we’ll add a narrow piece of wood around the back of the frame. Then, we’ll add glue to it and glue the panel to it to connect the two.
Hope this helps!
Cheers,
Jill
PS. I recently made panels without any power tools! Check that out here.